FarAboveRubies
  • Blogs
    • Blog
    • My Wedding Dress
  • Gallery
    • Formal Wear Gallery
    • Historical Costume Gallery
    • Theatre Gallery
  • Shop

1880's bustle

10/6/2014

0 Comments

 
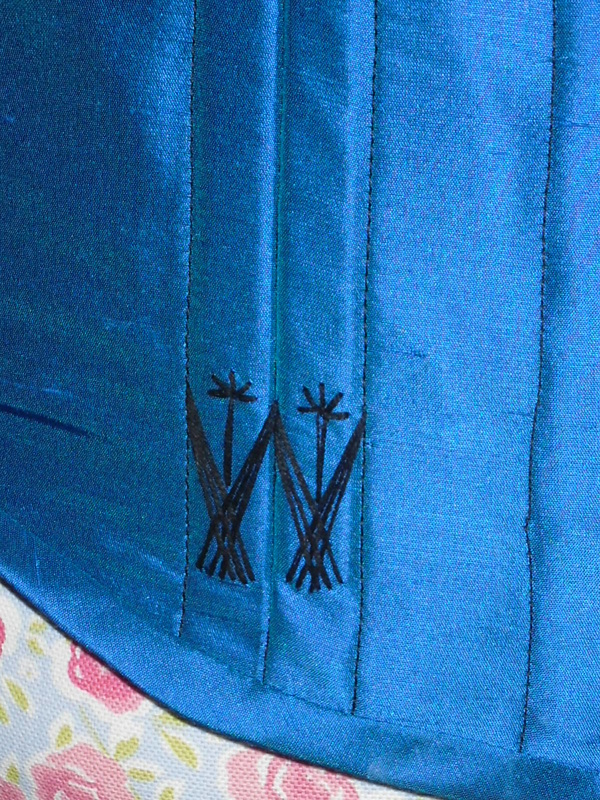
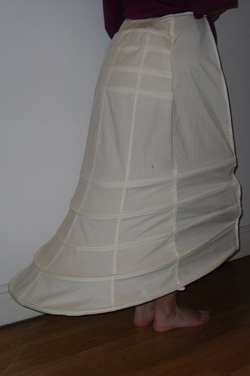
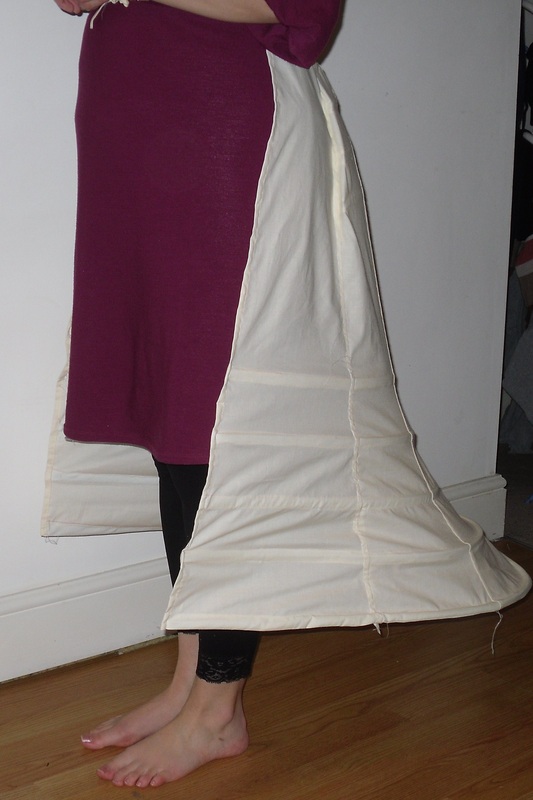
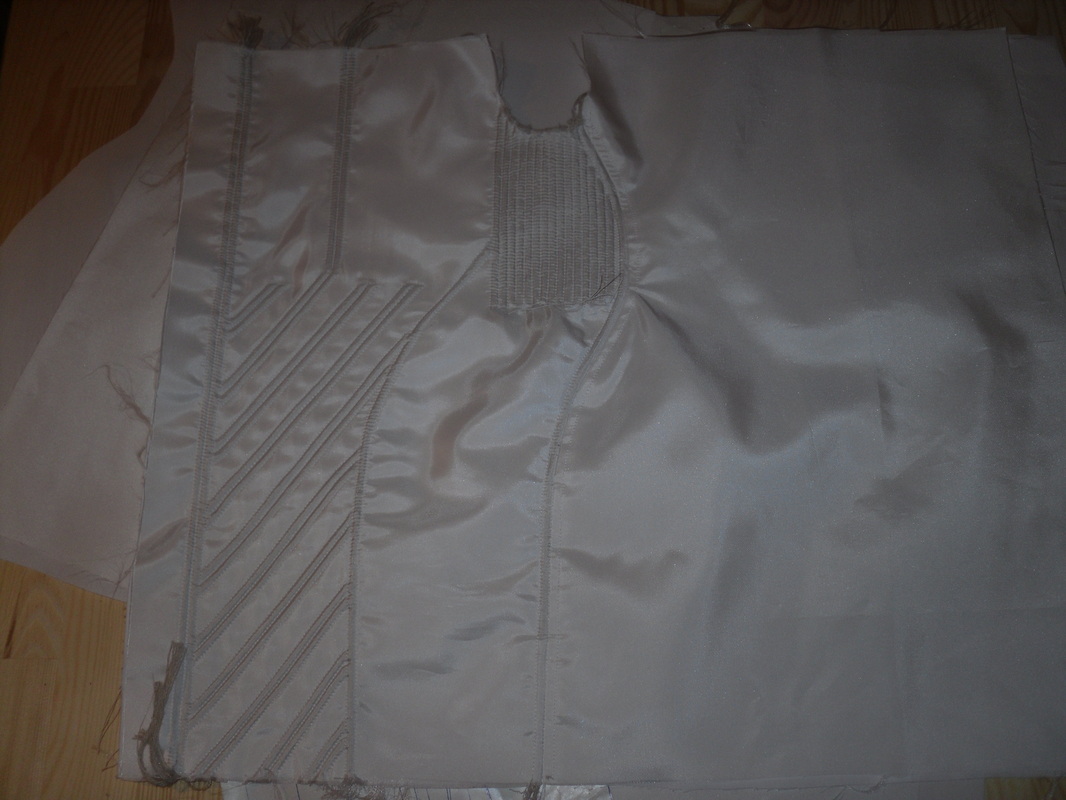
This mid 1880's style bustle was made as part of a course at The School of Historical Dress in November 2013. I learnt so much on this course (although I did promise not to give away any trade secrets, so this post won't be super detailed), and the end result is a 100% accurate duplicate of a extant bustle. The bustle has a horsehair pad at the top and thread covered steels to create the shape - notice how much narrower they are than the plastic covered stuff you can buy on the high street.
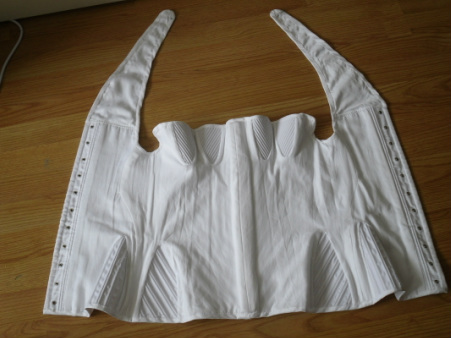
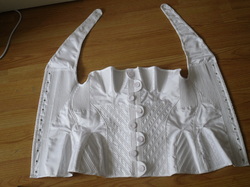
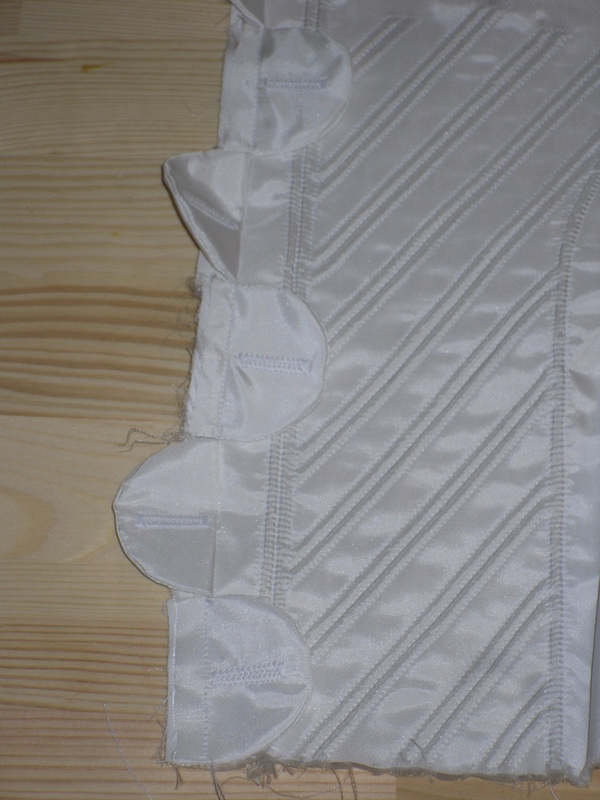
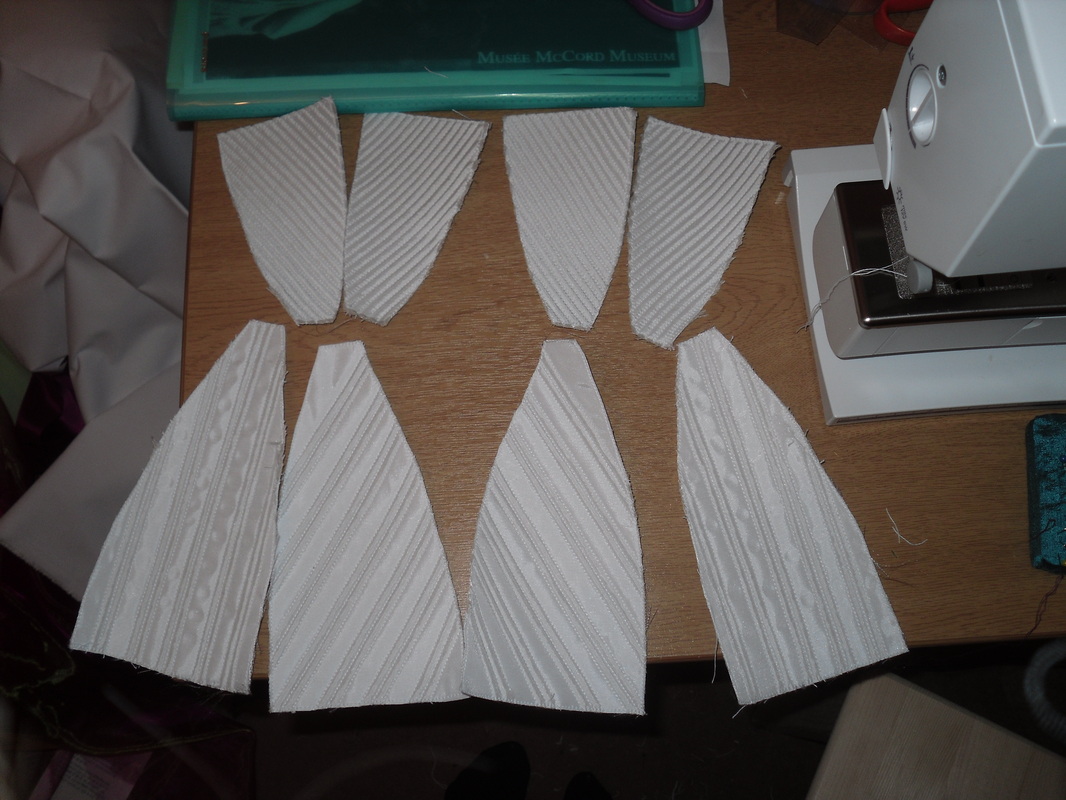
Check out my stripe matching - I'm super pleased with it, and it was achieved through marking the stitching lines with chalk then with thread, then basting everything before stitching it. There was a LOT of hand sewing in the course, and I actually learnt how to use a thimble properly!
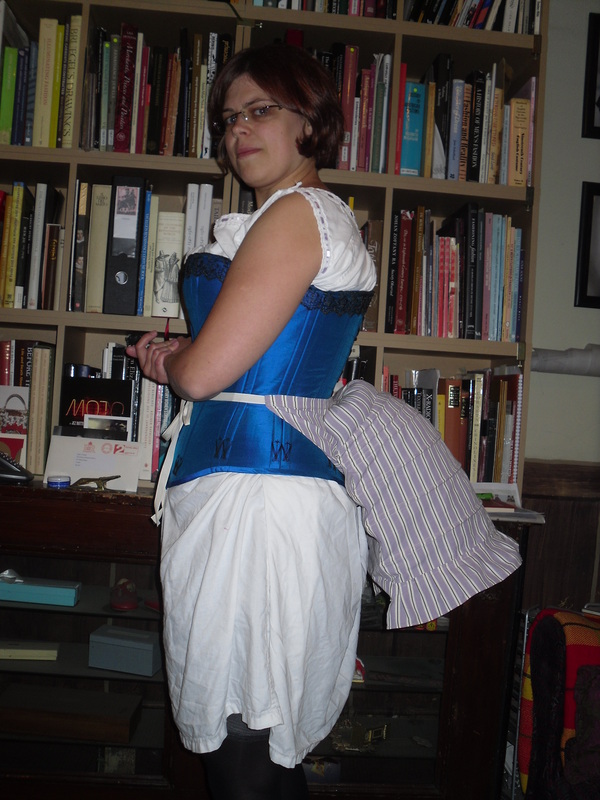
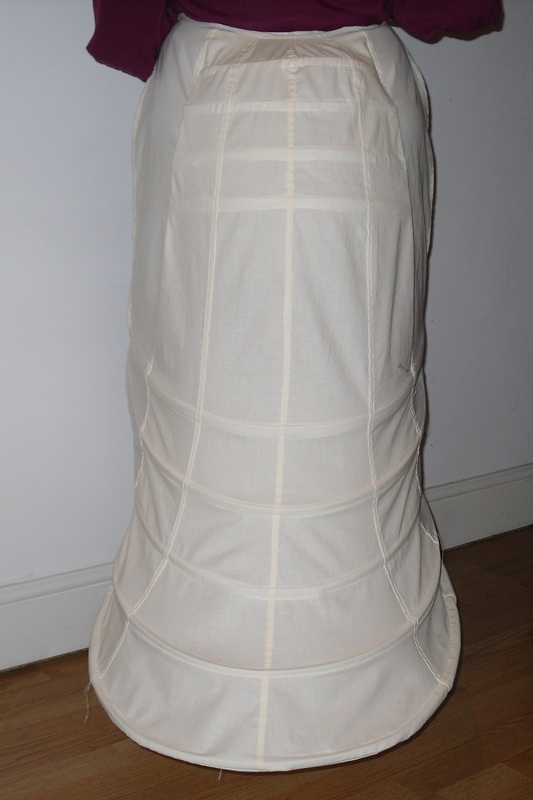
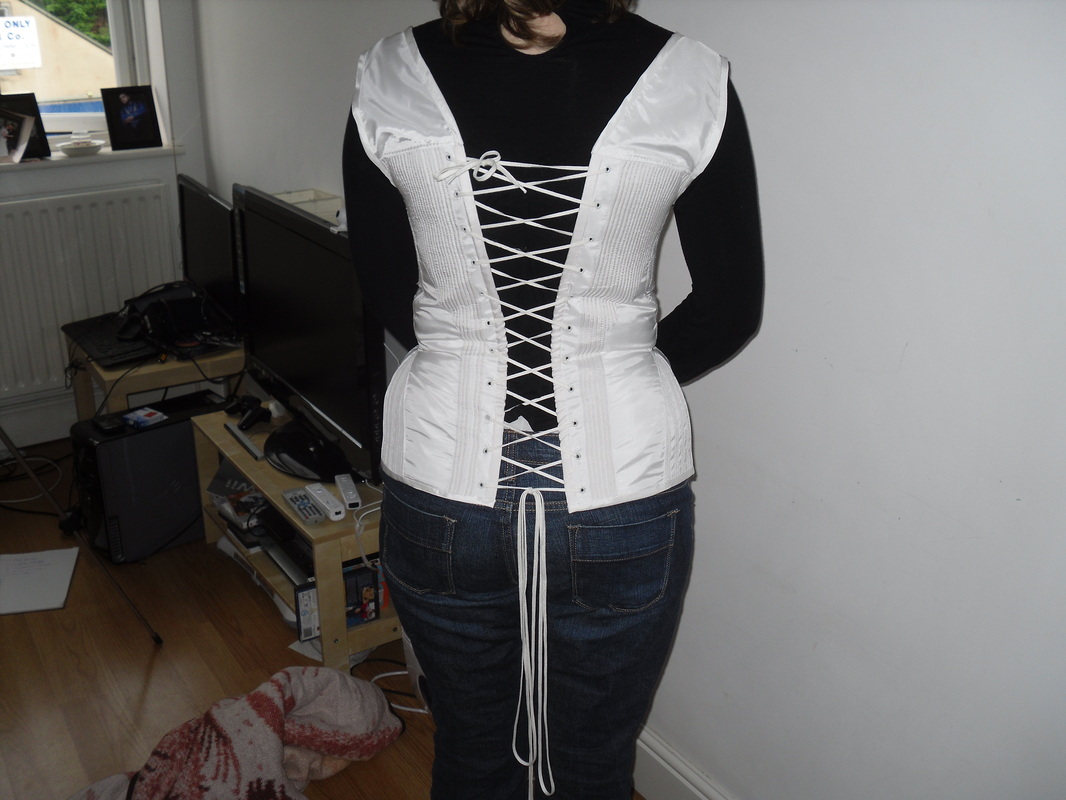
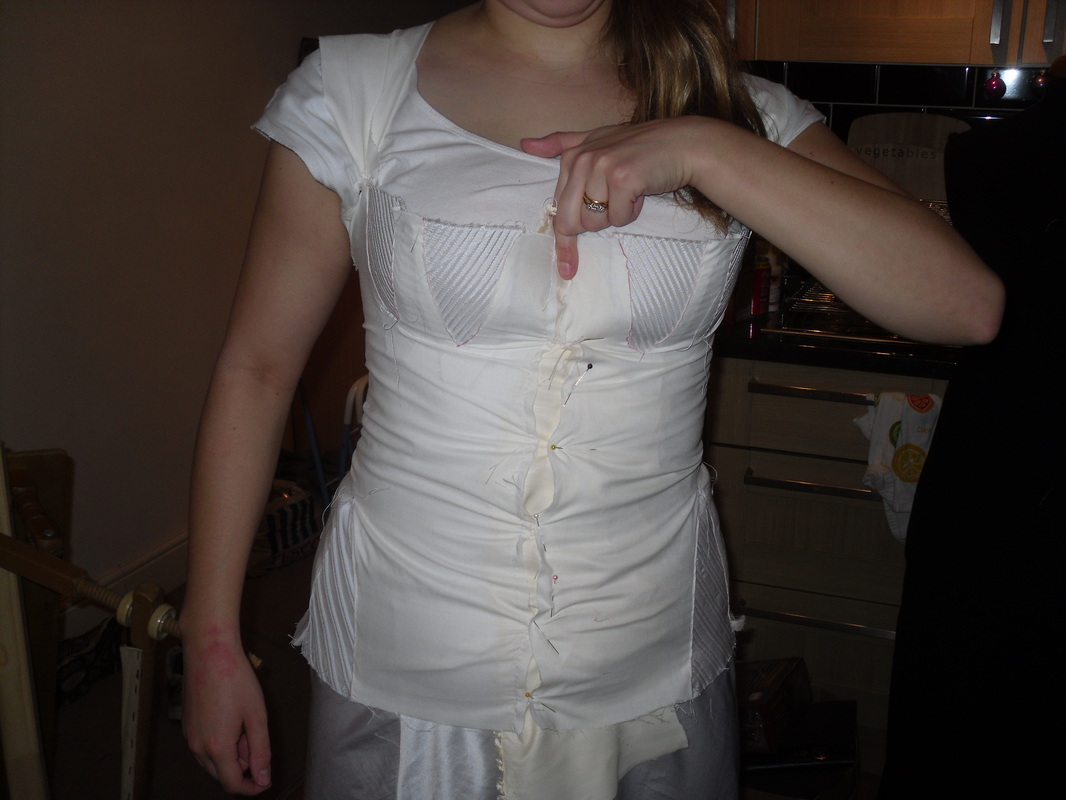
Notice in the second picture that the bustle is actually narrower than I am - this is a feature of the second bustle period. Useful because it means that bustles at this time are one-size-fits-all. The first bustle period is a different shape, adding width to the body as well as sticking out at the back. I'd never noticed the difference before, but after Luca (the teacher on this course) took us through Harper's Bazarre pointing out the feature of each period it's super obvious. And a really good lesson in the importance of primary sources - after looking at the fashion plates of the time we looked at pictures of extant garments in books, and with out new knowledge of trends over time it was obvious that some of them had actually been mislabelled.
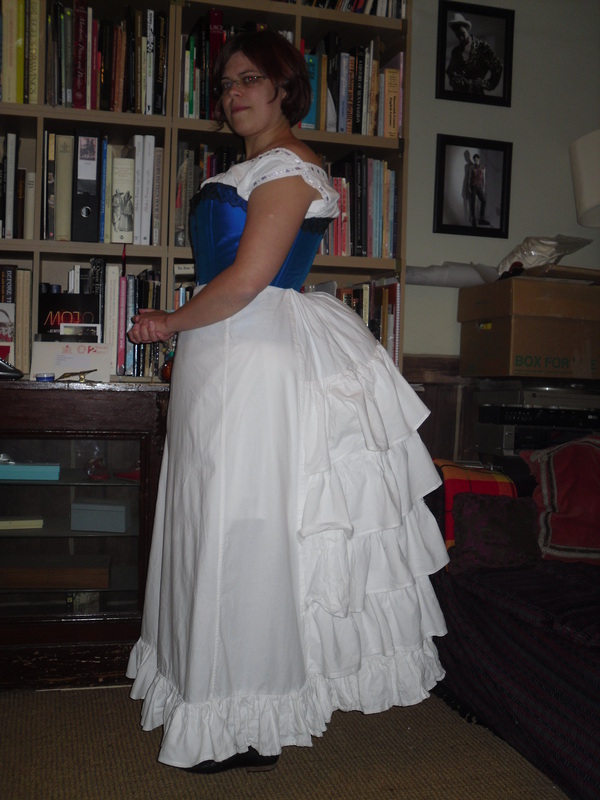
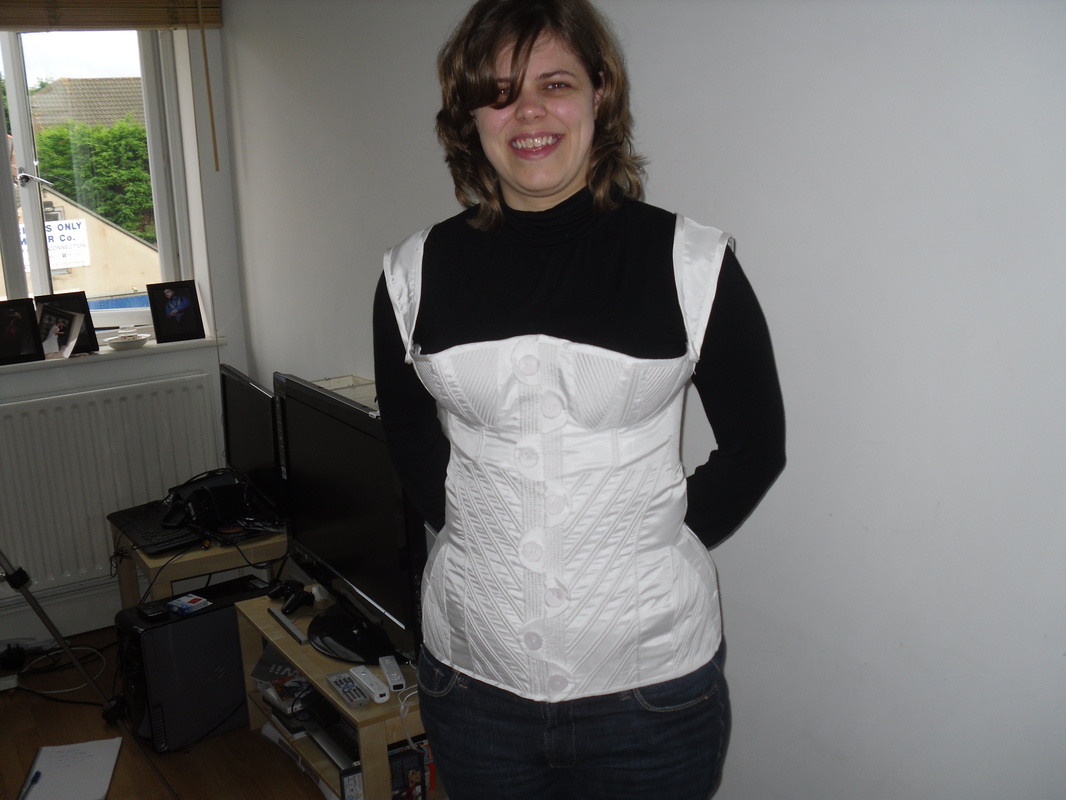
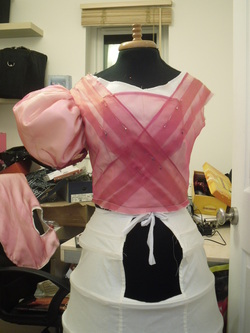
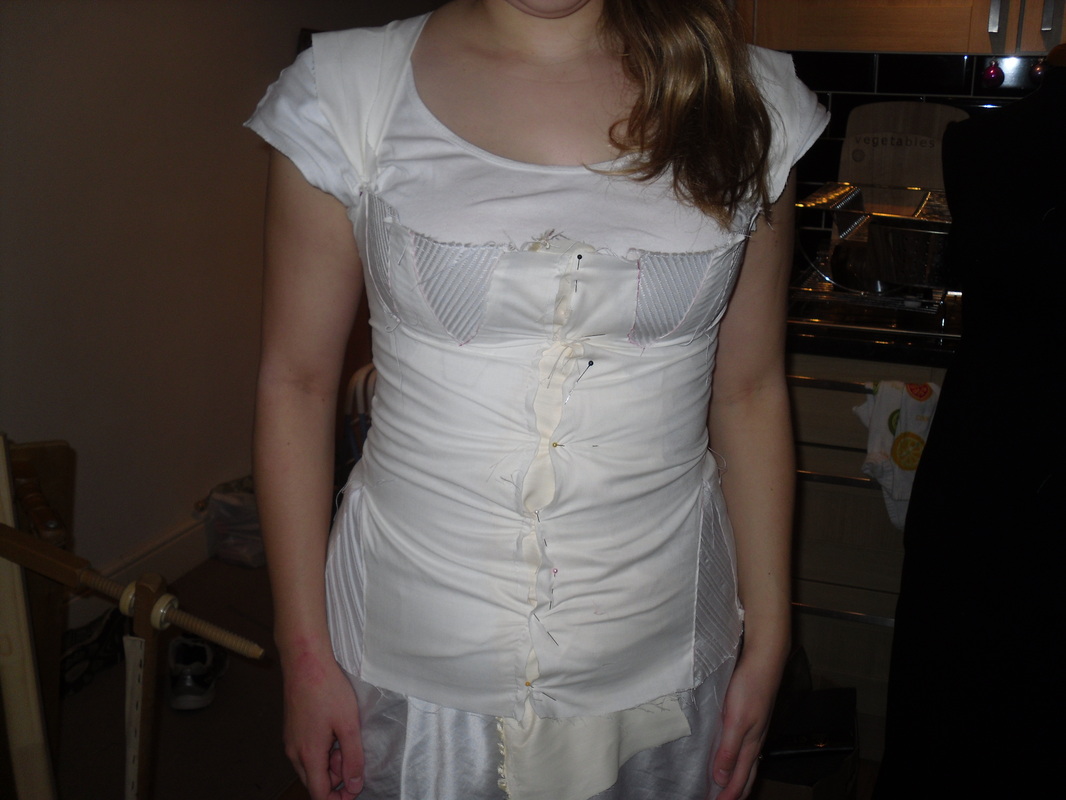
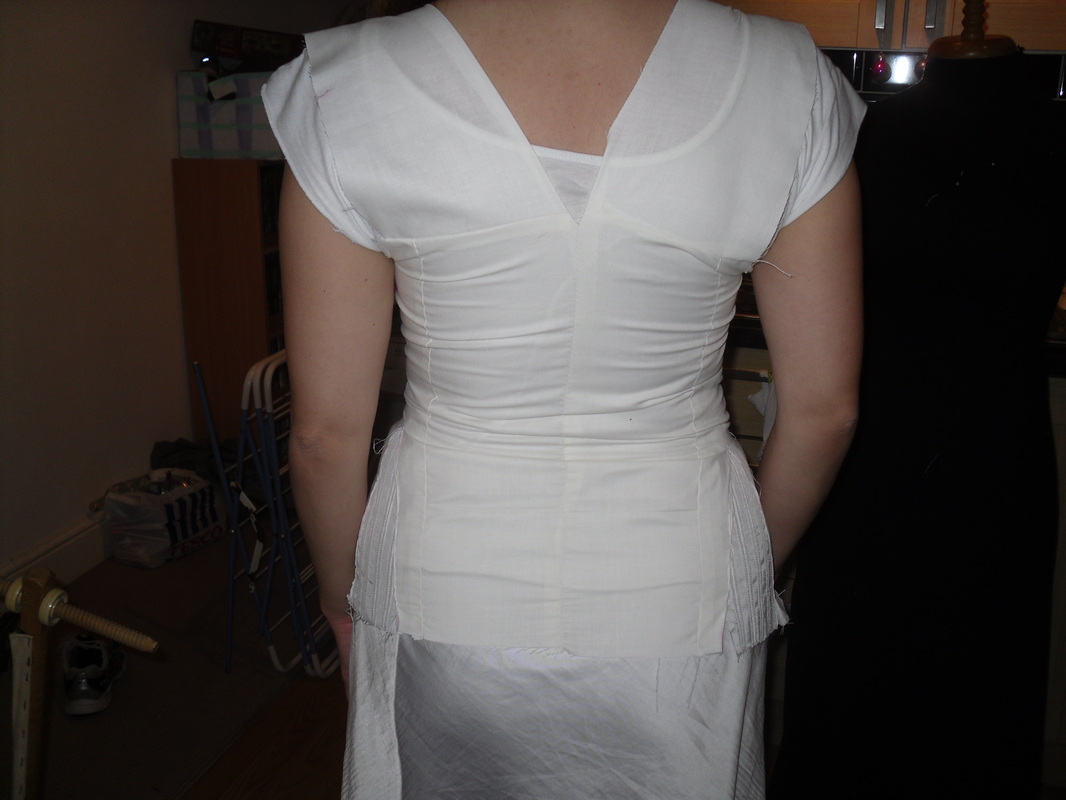
Below you can see me wearing the bustle along with the rest of my victorian underwear (which I now need to remake to be more historically accurate, and of course to fit my post baby body!) It's interesting to see how the weight of the petticoat affects the shape of the bustle - in the pictures without it actually sticks up slightly.
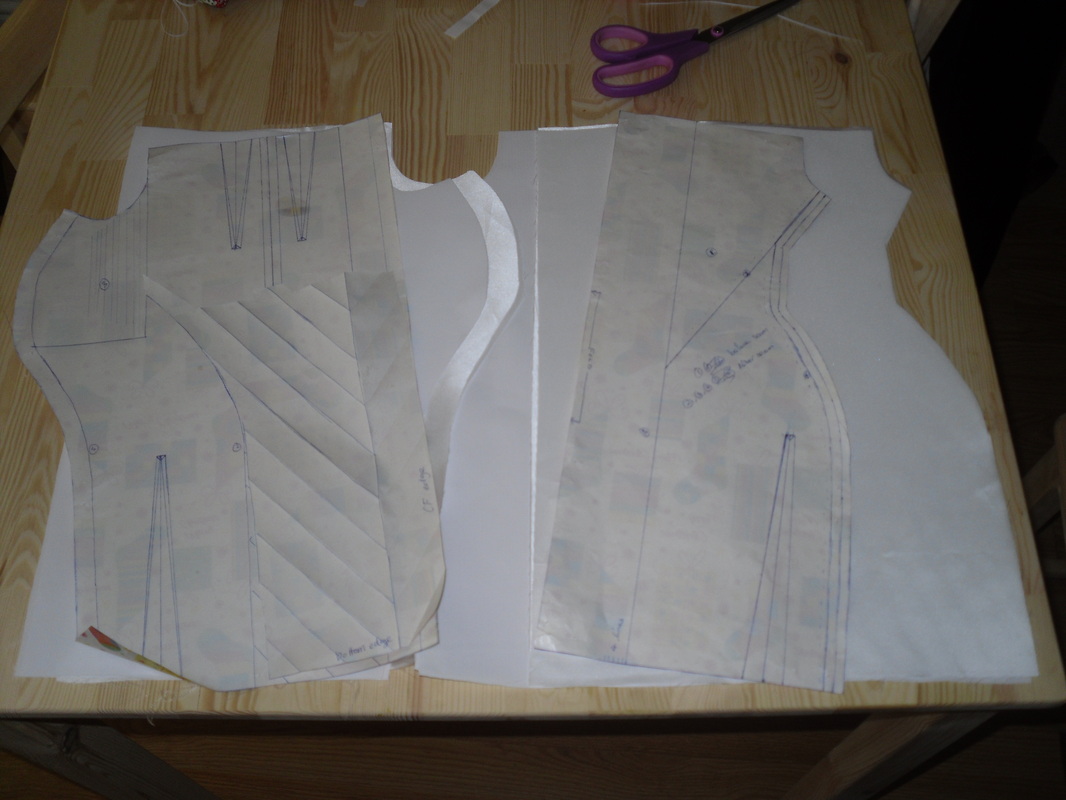
Hopefully my remade underwear will be done using some of the principles I learnt on the course - using primary sources to identify the correct shapes and draft the pattern, and studying the construction of antique pieces to find the correct techniques to use. More on that later.
Picture
0 Comments

Laughing Moon Dore Corset

5/12/2013

0 Comments

 
Picture
As mention a couple of posts ago I was badly in need of a new corset, and here it is! I am so in love with this corset!
This was my first attempt at the dore, and my first double layer corset. I'm really please with the smoother result. I used some more of my screwfix cable ties as the boning on this one, and I'm still a big fan of the ease of cutting to size, and the amount of support they give. I don't lace particularly tight, and to be honest don't see myself going back to steel boning.
I also did flossing for the first time on this corset. I like the way it looks, and I like that it keeps the ends of the boning away from the binding at the bottom of the corset and means I can make this perfectly neat.
Overall a great big yay from me!

0 Comments

Historical Sew Fortnightly - the UFO challenge

1/27/2013

0 Comments

 
Picture
Historical sewing blogger "The Dreamstress" has organised a rather wonderful project for 2013 - the historical sew fortnightly. The idea is that every fortnight, there is a themed challenge to complete by the end of that fortnight. You can do as many or as few as you want, and the challenges are posted 7 challenges (so 14 weeks) in advance, and you can start as early as you want as long as its done in time. The themes posted so far have been really good - easy for anyone to come up with something that fits the theme regardless of period of interest etc.

The first challenge was to make something from the year XX13 - I missed that one, but it is the inspiration for my next few challenges - more on that later.

Challenge number 2 was to complete a UFO. While I have many USO's (new term I just invented: Un-Started Objects) I, once I've committed to a project 'm actually pretty good at sticking to a project until I finish it. So I only had one UFO to choose from. I cut out the pieces for the laughing moon train supporting bustle probably a year and a half ago (I think it was when I was handsewing lace on my wedding dress and decided I needed to do something quick and from pattern to regain my sanity). I got as far as marking the lines for the boning, making the lacing panels and sewing the center back pieces together, and that was it.

This project was pretty easy to complete, I decided I didn't like the idea of unfinished seams on the inside and as there were no instructions on finishing, I did flat felled seams. I cut my own bias binding to hold the steel in place, and the trickiest bit was getting the boning through the chanels. I need to research good ways of finishing ends of boning - I left them unfinished which means they sometimes catch, but finishing them would add bulk and its a prtty tight fit.

I'm not entirely happy with the end result. While the silhouette is good in theory, in practice the bustle swings forward, so the back is lower than the front. I wondered at first if I did something wrong, but after googling for pictures of how other's had done it, I noticed that they had the same problem (see
here for a thread on carolinabelles).  I tried a petticoat over the bustle to see if this helped, but it actually pushed it further forwards and the front edge of the bustle could be seen through the petti.

I can think of two ways of fixing this. The first is to add weights to the front edge, to counter balance the extra steel at the back. I tried this (with safety pins and cutelry!) and it definately improved matters, the problem is that all this balancign would be have to be redone for each petticoat and dress - things could get very heavy! The other thing I considered doing was moving the lower panel forward - at the moment it doesn't touch my legs at all. I found the following on the farthingales corset blog which sounds like they did this with good results.

"I also found that I needed to move the lower panel that is at calf level. The  pattern instructions indicated that this panel be attached further to the inner  curve of the bustle but I found it bounced off my calves too much when I walked
  - this may not have happened if I had a skirt over it to add weight. I moved the panel to the front edge of the bustle and preferred  the balance this gave."


I think that's what i'll try, but for know I'm declaring this unfinished object done - I'll revisit it when I havea dress to go over it!

The Challenge: #2 UFO
 Fabric: Unbleached Poly cotton curtain lining from fabricland
 Pattern: Laughing Moon #112 Hoops and Bustles, view C
Year: (According to the pattern envelope) 1869-1876 and 1883-1889
Notions: 36 grommets, ribbon for lacing, rigelene and hoop steel
 How historically accurate is it? Not very - the materials are whatever I happened to have, the assembly is all done by machine and I'm not even sure if the pattern is accurate - most bustles I see online are wire and tape, but that may be due to the tension placed on the fabric meaning very few fabric bustles survive.
 Hours to complete: Forgot I was going to be asked this question so I didn't keep track!
 First worn: Not yet - it needs a dress to go over it!
 Total cost: Around £20 for steel, £3 worth of grommets and £3 for fabric, so £26 - but it all came from stash!


0 Comments

1830s corset - finished at last!

7/4/2012

0 Comments

 
I cannot believe how long this took me to finish - I thought the cording was gonna be the slow bit!
The lining was cut from the same pattern as the corset, leaving out the gores. It was machine stitched along the top and bottom of the corset, then hand catch stitched at the sides and along the edge of the gores. I'm actually really proud of this finish!
Picture
Picture
The main hold up was with the straps, which I don't think were drawn quite right in the pattern. The pieces given are equilateral triangles, whereas the picture show the straps continuing in a straight line at the armhole edge and forming a wide 'V' at the centre back. I found I needed to take a triangular tuck, a generous 2" worth at the armhole edge tapering to nothing at the centre. Hence the delay - struggling to lace myself into the stays, and then needing to put pins in at my shoulder blades - not possible!

The white paint on the grommets needs another coat or two - at the moment its more of a grey/cream colour, although I still prefer that to the silver!

My major learning point from this corset is the fabric choice - I should've used something with a bit of stretch! Fortunately, I think I got away with it, but there are a couple of area where I would've like the corset to mould to my body a little better, and I think this would've been achieved by using something like a tightly woven linen rather than coutille. And now for lots of pictures! Please ignore the faces I'm pulling, its an involuntary response as soon as I know there's a camera pointing at me!
0 Comments

An 1830s corset - more cording

1/21/2012

0 Comments

 
I posted about the puckering problem on a couple of forums, and I think the problem is mainly due to my choice of fabrics. For authnticity, I would have needed to use linen, which has a lot more stretch than coutil, and this stretch allow room for the cording. Alternatively, I could have sandwhiched the cord between two layers of coutil, and then had the 'fashion fabric' over the top - apparently for corded corsets a heavy mateial combined with a light material is a biig no-no.
So, I decided to press on with the cording and see what happened. Inserting the gores seems to have eased the problem of the puckering at the bottom of the underarm cording. When I stretch the corset it dissapears completely  - I think I'm going to get away with it! :) The big question now is whether it will fit well enough to put the fabric under enough tension to pull it straight.
I also made the button tabs for the center front. They are a single layer of coutil sandwhiched between two layers of saitn, and I love them already! I've stitched buttonholes but don't plan on cutting them, instead iI will stitch the buttons on through both the tab and the corset, but I wanted to have the buttonholes there to peak out under the buttons. I don't have suitable buttons yet, the ones on the original are fabric covered and very flat, possibly just a metal ring with fabric stretched over? I will have to experiment to find the right technique.
The cording, by the way, is starting to drive me nuts. mostly because my threading tool is shorter than the longest channels, I will have to do something about this before I tackle the other side! But on the plus side, I'm clearly still in love with this design, because I keep coming back to it when I planned to start work on something else!
0 Comments

An 1830s corset - cording started

1/17/2012

0 Comments

 
Updating as promised! This week, I turned the biro marked muslin into a pattern, tracing the lines onto wrapping paper and measuring to ensure that the spacing was regular where it should be. I also mad a guide piece for the front section, so that i could pin it in place and stitch along the folded/cut edges where needed.
I got one front piece corded, the longer peices were a bit of a struggle! Where all else failed, I poked holes in the coutil and pulled the cord to the outside, then started again through the same hole. This worked reasonably well, but you have to be careful not to get and kinks or twists in the cord or it won't go back through.
There seems to be a bit of uneven-ness between the cording and the seams, where the cording has shrunk some sections (I hope - otherwise its because I stitched uneven seams). I'm hoping that once I add the bust and hip gores the tension will be released.
Picture
I figure I also better update you on dress progress, actually done last week but it got missed in that huge batch of updates! I started by pinning the fabric to the front of the bodice to figure out the placing of the pleats. I then took the bodice seams apart and sewed it together again with the overlay in place, including  flat pieces at the back.
I added a sleeve, unfortunately I cut the armband way too small so I couldn't actually get it on! I will fix this, and may need to make the armholes a little wider too since it had all that extra fabric gathered in!
Anyway, with the sleeve inI can drape the pattern for the petal like sections which go over the sleeves in the original.

0 Comments

An1830s Corset

1/8/2012

3 Comments

 
As a foundation for my 2011 Holy grail project (whats that you say? Its 2012 already? well, um.... actually, once I realised I would be getting married in 2011 this became a pretty low priority, so its now a 2011-2012 project) I need an 1830's style corset. This is somewhere between regency and victorian, the corset is full length but is still more about lift and separate and general smoothing rather than cinching in the waist.
The pattern I have is by past patterns http://www.pastpatterns.com/001.html. However, I'm also in love with the 1830s corset shown in Jill Salens book on corsets, http://www.amazon.co.uk/Corsets-Historic-Techniques-Jill-Salen/dp/1906388016 which has a really cool front fastening with buttons and tabs on alternating sides. The plan is to use the pattern as a base, but following the cording pattern from the book. I may also reposition the side seam, although the hip gores seem to be in different positions in the book and the pattern so I'm not sure how that will work.
Picture
I was concerned about how long it was going to take to do the cording if I sewed channels then threaded the cord through, so I attempted to sew channels with the cord in place. My front layer is satin (dull side out) and the back layer is coutil. I used my zipper foot to sew s close to the cord as possible with the cord pressed up agaist the previous line of stitching. Unfortunately this method caused diagonal wrinkles across the cords. I actually quite like this wrinkled effect, but its not uniform enough to be able to use. I also like that I can cut the coutil to shape, attach a larger piece of satin and  then trim the satin to match. The coutil piece doesn't seem to shrink in the process. If anyone has a tip for cording in this way I'd be interested to hear for future projects.
For my second attempt at cording, I sewed the channels and then threaded the cording through -MUCH better :) To stitch the channels, I set the needle position to 4.5 on my bernina and kept the edge of the standard foot level with the previous line of stitchin. My cording is a doubled length of tesco value string, and as a threading tool I'm using a piece of millinary wire with a loop twited in.
I traced the pattern pieces for the gores and marked angles and positions for the cording, following the pattern from the book. Stitching and cording these pieces took much less time than I expected, so I'm feeling pretty good about using this me

At this stage I decided I actually better make a fitting muslin - If I'd carried on and corded the two main pieces and the corset hedn't fit, I'd have been pretty fed up! Fortunately, it fit really well! I forgot to leave a seam allowance at the front so that looks funny, as does the lack of a busk down the front, which I assume will pull the front in between my breats. Anyway, its certainly close enough that I can continue and make any small fitting adjustments with the cording in place.
By the way, I put one of the front hip gores on the wrong side, so then put the other in back to front so that the cording would slope down towards the front as it should.
The final step was to mark on the muslim where the cording should go. I also had several attenpts at drawing a new side seam, still not sure about this one! I will transfer the markings to paper, and then think very carefully about which order to sew the sections in - I'd like to be cording open channels as far as possible, rather than having to poke through the fabric to get to something which is sewn shut across one end.
And thats all for today!
3 Comments

    Author

    My crazy costuming, sewing and maybe other stuff too blog! Hopefully others can learn from my mistakes and I can learn from your comments :)

    Hey you! ;)

    According to the stats people are actually visiting this site - I'd love to know who you are so please leave comments!

    Archives

    June 2017
    April 2017
    February 2017
    August 2016
    February 2016
    January 2016
    June 2015
    October 2014
    September 2014
    October 2013
    May 2013
    April 2013
    March 2013
    February 2013
    January 2013
    November 2012
    October 2012
    September 2012
    August 2012
    July 2012
    June 2012
    April 2012
    March 2012
    January 2012
    October 2011
    August 2011
    February 2011
    January 2011
    December 2010
    November 2010
    October 2010

    Categories

    All
    1830s
    1860s
    1870s
    1880s
    Bridal
    Coat
    Custom Order
    Florence Maud Dowding
    Historical Accuracy
    Historical Sew Fortnightly
    Holy Grail 2011
    Inspiration
    Kids Clothes
    Modern Clothing
    Pattern Drafting
    Project Destash
    Random Stuff
    Underwear
    Victorian Menswear

    RSS Feed

    Picture
Powered by Create your own unique website with customizable templates.