FarAboveRubies
  • Blogs
    • Blog
    • My Wedding Dress
  • Gallery
    • Formal Wear Gallery
    • Historical Costume Gallery
    • Theatre Gallery
  • Shop

Cloning a bridesmaids dress

3/28/2012

0 Comments

 
Picture
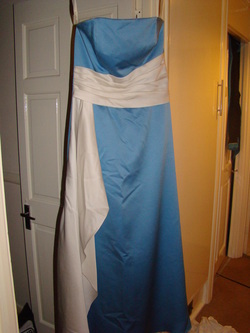
 'C' contacted me and asked if I could make her a bridesmaids dress - sure! But what makes it a bit more complicated is that she already has dresses for two of her bridesmaids, and wants a third one to match! Here's the picture she sent me. The two dresses she had were slightly different shades, so she was happy to have a third shade for the third dress, so I wasn't too worried about matching fabric (its duchess satin by the way).

Picture
Matching the fabric turned out to be way more of an effort than I expected - I tried fabric land, John Lewis and tatters, no luck - they all hade baby blue, dark blue and teal, but nothing in between - I guess this colour isn't one of this seasons must haves.
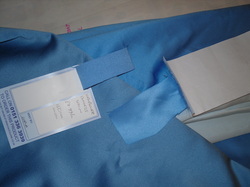
I turned to the internet for help, and requested samples from two place - bridallace,co,uk and calicolaine.co.uk. Bridal lace was particularly helpful, sending not only the swatch I requested but 3 similar blues in duchess stin.  Both companies privided really good matches (I was so excited to see them, I'd just about given up by that point), but the calico laine offering ws half the price, so thats what we ordered. There has so far been quite a lot of hassle with the order - they get the benefit of the doubt so far, but if it doesn't work out to my satisfaction I'll tell you all about it ;)
Picture
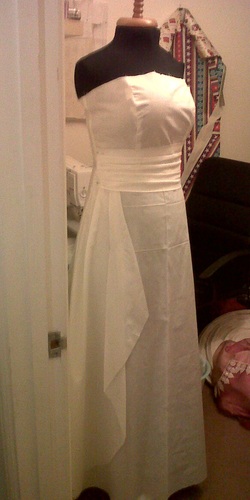
And last but not least, here's my toile of the dress. I started with Simplicity 4655 (Out of Print) as I had it to hand but made a whole load of changes!  I added a waist seam and merged the three front panels into one at the front, and changes the back to have two panels on each side instead of three.
The waist section was probably the trickiest to draft, I started with a rectangle wide enough to go round the front of the dress, and then measured and marked up each side where each pleat should fall. What I didn't realise was how much curve the uneven pleats were going to add! I ended up with a piece which was much too short, so I cut it up the middle and added another couple of inches. In fact in these pictures its still a little too short, it stretches seam to seam but there's no seam allowance left.
The drape I drafted by drawing the chape of the original drape on a piece of paper, complete with pleats and overlaps. I then traced each layer seperately, cut them out and stuck them together in 'unfolded' format. This worked out perfectly first time!

0 Comments

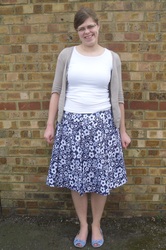
A pleated skirt with a yoke - making it fit!

3/25/2012

0 Comments

 
Picture
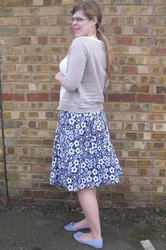
Wow, so much learning on this one = and I'm so pleased with the result!

The first thing the teacher suggested was that I make up the basic skirt block and alter it to fit me (if needed). In order to be able to manipulate the block properly, I needed to stick to straight lines where there were straight lines - no adding in curves or corners where there weren't any before.

Once I made up the block and put it on, it became very obvious that the front darts ended too far down for me, nd that it was too big on the hips. I resolved this by taking a vertical half inch tuck down the front form the dart to the hem. I then transfered this to the bock by cutting vertically from the point of the dart to the hem, overlapping the pieces by half an inch and tracing round to create a new block. If you make an lateration like this, don't forget that the front block should be slightly wider than the back block - this is so the side seams fall slightly to the back and can't beseen from the front. I just got away without having to correct for this on my alterationj.

Correction number 2 was in the way I drafted the pattern - I realised later that I should have manipulated the pattern to remve the dart THEN drawn the yoke. Otherwise, I risked removing a larger angle from the yoke than from the skirt, which would of course form a bubble or pont like the one I was seeing.

I redrafted the pattern from scratch and it looked much better than before, but still not perfect - in orde to get to perfect, I needed to improve my sewing technique. When I sewed the yoke to the skirt, I had stay stiched the dip in the main skirt section, snipped into the point and sewed each section seperately. This was a mistake! I sewed a test version all in one, stopping at the points with the needle in the fabric to flip the excess fabric to the other side of the needle, pivot and carry on.

I added baby ribbon down the edges of the pleats to emphasize the pleats, and top stitched the yoke for the same reason!

0 Comments

An 1830s corset - even more cording!

3/15/2012

0 Comments

 
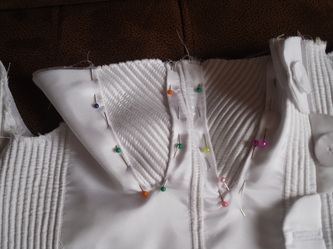
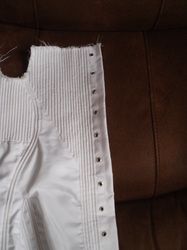
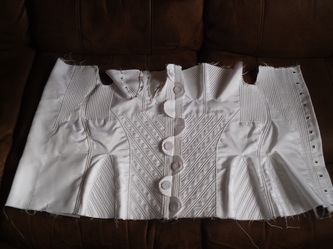
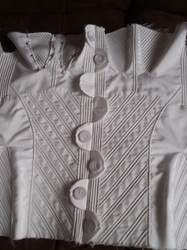
I'm nearly there with the cording - I've got the two halves of the corset sewn together and all the gores in (7 of the 8 gores in place in these pictures). I have a few row left to do on the right back edge, but the end is in sight!

To insert the gores, I first mark the cutting line on the back on the coutille in pencil. I add a half inch on each side at the edge and a quarte inch each side at the point, then joni the dots to mark a wedge shape around the cutting line. I then machine stitch this in a small length, before cutting along the line to just before the end, where I snip into the corners to for a triangle. Press the cut pieces under and position the gore underneath. I keep a half inch seam allowance from the edge of the gore as far as possibe, forcing the straight edge to for a curve. Once its all pinned, I top stitch all the way around as close as I can to the edge. I found the gores were quite a lot longer than the cuts made to recieve them, so I trmmed them once they were in place.

I'm really pleased with the way it looks, and even more please to report that it fits! I was getting more and more nervous every time I held it up against myself, but I got to the point where I could tack on the shoulder  straps, put the grommets in and lace it up to check. So please - lacing it comfortably tight I get a 2" gap down the back, and the wrinkles from the cording disappear. The shape is quite straight on the waist , but I think thats probably how its meant to be! The straight busk at the front (more on that next time) pulls it in between my breasts and gives a nice shape.

I decided to use non-peiod correct metal grommets for the lacing, as I wanted the strength without the hours of hand stitching through coutille! I've bought some white enamel paint to paint them to match, and will probably cover them in buttonhole stitch some day when I feel like stitching in fromt of the TV.

Pictures of me wearing it next time (when I have something on underneath to protect my modesty!)
0 Comments

    Author

    My crazy costuming, sewing and maybe other stuff too blog! Hopefully others can learn from my mistakes and I can learn from your comments :)

    Hey you! ;)

    According to the stats people are actually visiting this site - I'd love to know who you are so please leave comments!

    Archives

    June 2017
    April 2017
    February 2017
    August 2016
    February 2016
    January 2016
    June 2015
    October 2014
    September 2014
    October 2013
    May 2013
    April 2013
    March 2013
    February 2013
    January 2013
    November 2012
    October 2012
    September 2012
    August 2012
    July 2012
    June 2012
    April 2012
    March 2012
    January 2012
    October 2011
    August 2011
    February 2011
    January 2011
    December 2010
    November 2010
    October 2010

    Categories

    All
    1830s
    1860s
    1870s
    1880s
    Bridal
    Coat
    Custom Order
    Florence Maud Dowding
    Historical Accuracy
    Historical Sew Fortnightly
    Holy Grail 2011
    Inspiration
    Kids Clothes
    Modern Clothing
    Pattern Drafting
    Project Destash
    Random Stuff
    Underwear
    Victorian Menswear

    RSS Feed

    Picture
Powered by Create your own unique website with customizable templates.