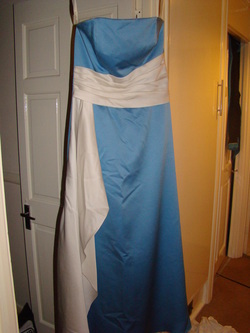
'C' contacted me and asked if I could make her a bridesmaids dress - sure! But what makes it a bit more complicated is that she already has dresses for two of her bridesmaids, and wants a third one to match! Here's the picture she sent me. The two dresses she had were slightly different shades, so she was happy to have a third shade for the third dress, so I wasn't too worried about matching fabric (its duchess satin by the way).
Matching the fabric turned out to be way more of an effort than I expected - I tried fabric land, John Lewis and tatters, no luck - they all hade baby blue, dark blue and teal, but nothing in between - I guess this colour isn't one of this seasons must haves.
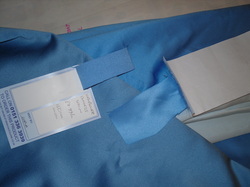
I turned to the internet for help, and requested samples from two place - bridallace,co,uk and calicolaine.co.uk. Bridal lace was particularly helpful, sending not only the swatch I requested but 3 similar blues in duchess stin. Both companies privided really good matches (I was so excited to see them, I'd just about given up by that point), but the calico laine offering ws half the price, so thats what we ordered. There has so far been quite a lot of hassle with the order - they get the benefit of the doubt so far, but if it doesn't work out to my satisfaction I'll tell you all about it ;)
I turned to the internet for help, and requested samples from two place - bridallace,co,uk and calicolaine.co.uk. Bridal lace was particularly helpful, sending not only the swatch I requested but 3 similar blues in duchess stin. Both companies privided really good matches (I was so excited to see them, I'd just about given up by that point), but the calico laine offering ws half the price, so thats what we ordered. There has so far been quite a lot of hassle with the order - they get the benefit of the doubt so far, but if it doesn't work out to my satisfaction I'll tell you all about it ;)
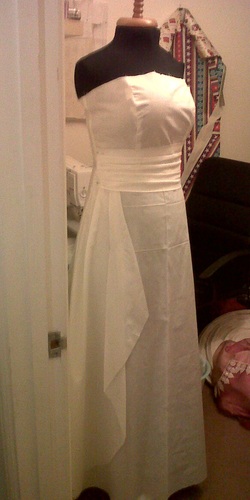
And last but not least, here's my toile of the dress. I started with Simplicity 4655 (Out of Print) as I had it to hand but made a whole load of changes! I added a waist seam and merged the three front panels into one at the front, and changes the back to have two panels on each side instead of three.
The waist section was probably the trickiest to draft, I started with a rectangle wide enough to go round the front of the dress, and then measured and marked up each side where each pleat should fall. What I didn't realise was how much curve the uneven pleats were going to add! I ended up with a piece which was much too short, so I cut it up the middle and added another couple of inches. In fact in these pictures its still a little too short, it stretches seam to seam but there's no seam allowance left.
The drape I drafted by drawing the chape of the original drape on a piece of paper, complete with pleats and overlaps. I then traced each layer seperately, cut them out and stuck them together in 'unfolded' format. This worked out perfectly first time!
 RSS Feed