Ok, time for a progress check against my original to do list, and a few to-do's to be added as well.
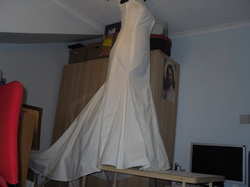
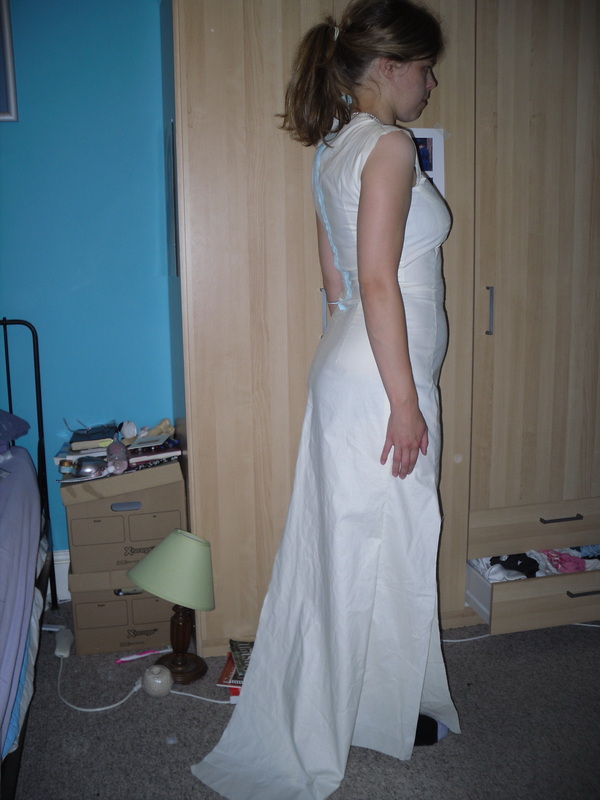
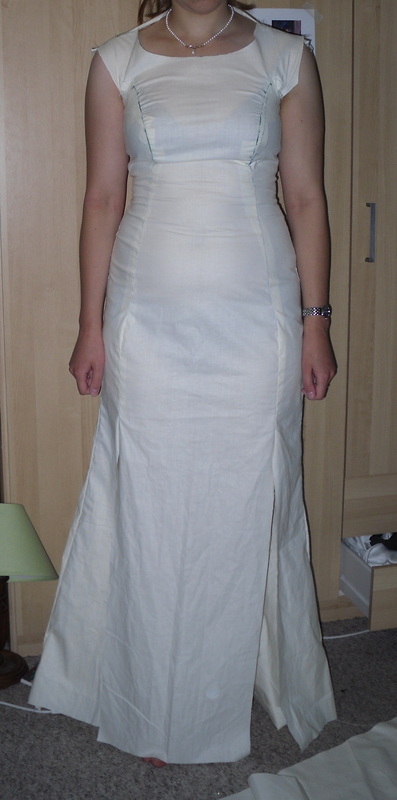
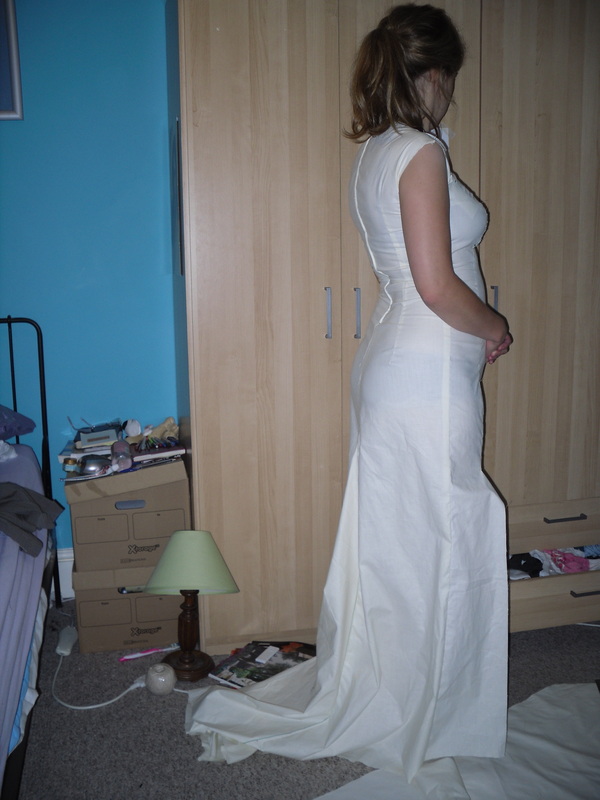
Tasks for today: Cover 30 buttons and adjust the bust on the mockup to fit better.
Mockups
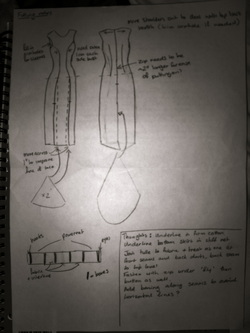
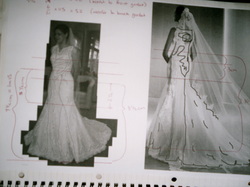
Before anything else, complete as many mock-ups as necessary to make sure the pattern design and fit is perfect.
Calculate yardages required using perfected mockup DONE (ok, mockups not finished but its close enough)
After purchasing lace, adjust pattern if necessary to place points of scallops over seams.
Shopping
Foundation materials
-White Coutil (Purchased, www.fabricland.co.uk)
-Wide Plastic Boning (Purchased, fabricland)
-Narrow Plastic Boning (Purchased, Fabricland)
-Power Net (Purchased, fabricland)
-Hook and Eye tape (Purchased, Fabricland)
-Silk Dupion for lining (Purchased, Silk Baron)
Interior Fabrics
-Polyester lining (Purchased, Fabricland)
-Dress net to interline Skirt (Purchased, fabricland)
-Cotton Lawn to interline bodice (Purchased, fabricland)
-Horsehair Braid for hem (Purchased, fabricland)
Outer Fabrics
-Power woven White silk Dupion or Duchesse Satin (Purchased, Silk Baron)
-Tulle (Purchased, Fabricland)
-Lace
– must have a Scalloped edge, between 6” and 10” deep, the deeper the better
- Must have (or be pieced to) long strips, 2-3" wide, which can be used for covering seams.
- Must have motifs which can be used to decorate skirt panels - about 7" long, more than one design would be great
- Must be able to peice together to completely cover bodice and sleeves
Narrow Piping cord for Roleux loop (Purchased, Fabricland)
Cover buttons (Purchased, Fabricland)
Zip (Purchased, Fabricland)
Inner structure
Cut out coutil
Cut out Power Net
Cut out lining
Assemble
Add Boning
Add Hooks and Eyes
Petticoat
Draft Pattern
Cot out and assemble
Add net
Add detachable train support
Lining
Cut out lining
Assemble lining
Attach Lining
Attach zip
Attach inner structure to lining at side seams
Dress
Cut out Fabric
Cut out interlining
Cut out Net
Hand tack interlining to fabric
Hand tack lace to fabric to Godet level, front and back seams
Stitch seams to Godet level, front and back seams
Apply Godet to net
Apply godet to fabric
Stitch and Trim side seams in net
Stitch side seams in fabric
Make and apply rolleaux button loops
Cover Buttons
Stitch on buttons
Make sleeves
Attach sleeves
Cut skirt facing strips
Apply facing and horsehair to hem of skirt
Trimming
Cut out lace
Pin on lace
Allow to stretch and reposition
Attach lace
Tasks for today: Cover 30 buttons and adjust the bust on the mockup to fit better.
Mockups
Before anything else, complete as many mock-ups as necessary to make sure the pattern design and fit is perfect.
Calculate yardages required using perfected mockup DONE (ok, mockups not finished but its close enough)
After purchasing lace, adjust pattern if necessary to place points of scallops over seams.
Shopping
Foundation materials
-White Coutil (Purchased, www.fabricland.co.uk)
-Wide Plastic Boning (Purchased, fabricland)
-Narrow Plastic Boning (Purchased, Fabricland)
-Power Net (Purchased, fabricland)
-Hook and Eye tape (Purchased, Fabricland)
-Silk Dupion for lining (Purchased, Silk Baron)
Interior Fabrics
-Polyester lining (Purchased, Fabricland)
-Dress net to interline Skirt (Purchased, fabricland)
-Cotton Lawn to interline bodice (Purchased, fabricland)
-Horsehair Braid for hem (Purchased, fabricland)
Outer Fabrics
-Power woven White silk Dupion or Duchesse Satin (Purchased, Silk Baron)
-Tulle (Purchased, Fabricland)
-Lace
– must have a Scalloped edge, between 6” and 10” deep, the deeper the better
- Must have (or be pieced to) long strips, 2-3" wide, which can be used for covering seams.
- Must have motifs which can be used to decorate skirt panels - about 7" long, more than one design would be great
- Must be able to peice together to completely cover bodice and sleeves
Narrow Piping cord for Roleux loop (Purchased, Fabricland)
Cover buttons (Purchased, Fabricland)
Zip (Purchased, Fabricland)
Inner structure
Cut out coutil
Cut out Power Net
Cut out lining
Assemble
Add Boning
Add Hooks and Eyes
Petticoat
Draft Pattern
Cot out and assemble
Add net
Add detachable train support
Lining
Cut out lining
Assemble lining
Attach Lining
Attach zip
Attach inner structure to lining at side seams
Dress
Cut out Fabric
Cut out interlining
Cut out Net
Hand tack interlining to fabric
Hand tack lace to fabric to Godet level, front and back seams
Stitch seams to Godet level, front and back seams
Apply Godet to net
Apply godet to fabric
Stitch and Trim side seams in net
Stitch side seams in fabric
Make and apply rolleaux button loops
Cover Buttons
Stitch on buttons
Make sleeves
Attach sleeves
Cut skirt facing strips
Apply facing and horsehair to hem of skirt
Trimming
Cut out lace
Pin on lace
Allow to stretch and reposition
Attach lace


 RSS Feed
