
Since I now have the green chiffon dresses completed I thought I'd give you a step by step guide to adding the chiffon fronts.
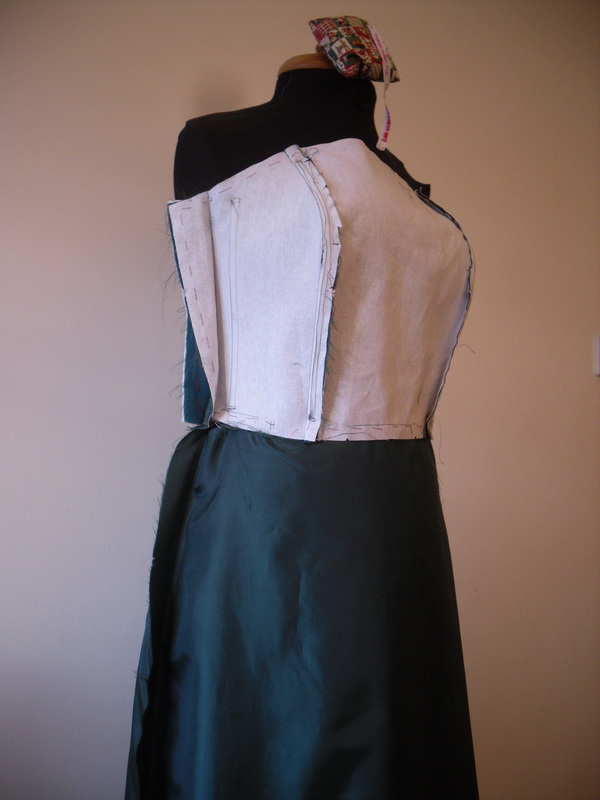
1. Fitting the bodice - pin the bodice to fit as needed
2. Sew the alterations as pinned
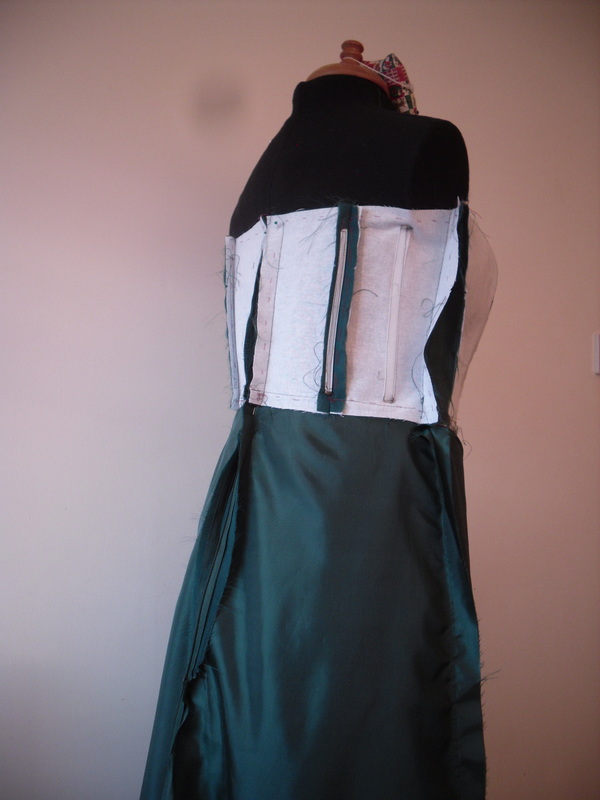
3. With alll the alterations done, you can add boning to the seam allowance as needed. Front...
4. ...and back I wanted to make sure I had a nice firm foundation to drape the chiffon over
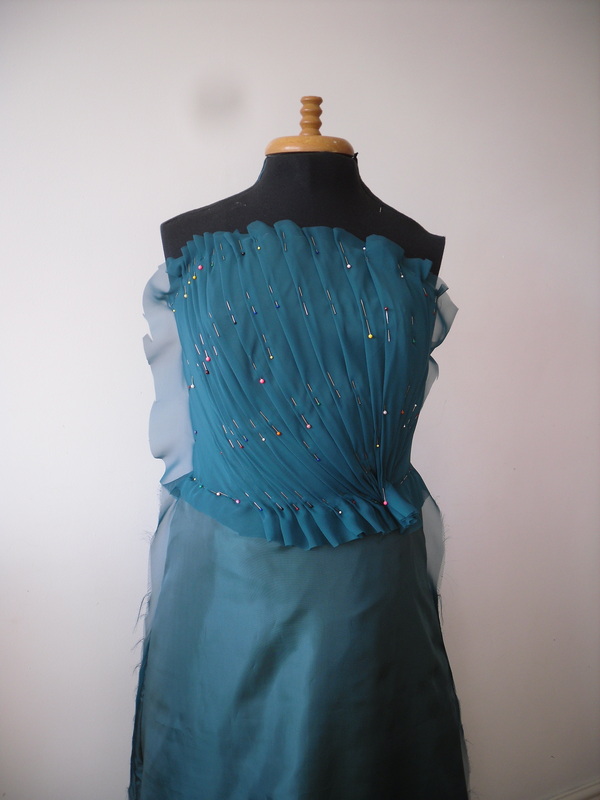
5. Pin the chiffon overlay to the bodice, pleating as desired to follow the curves of the bodice. I started with a large square of chiffon and used the bias as my starting line down the right hand seam.
6. Once your happy, unpick the seams to detach the bodice front from the dress and machine stitch around the edges to attach the chiffon. Remove the pins from the edges and trim the excess chiffon to the edges of the bodice. Hand sew the pleats down everywhere you have a pin.
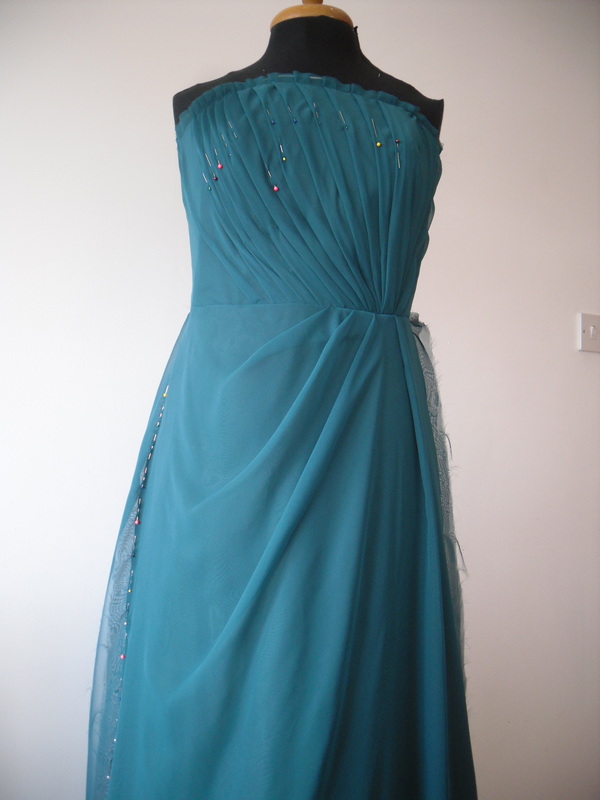
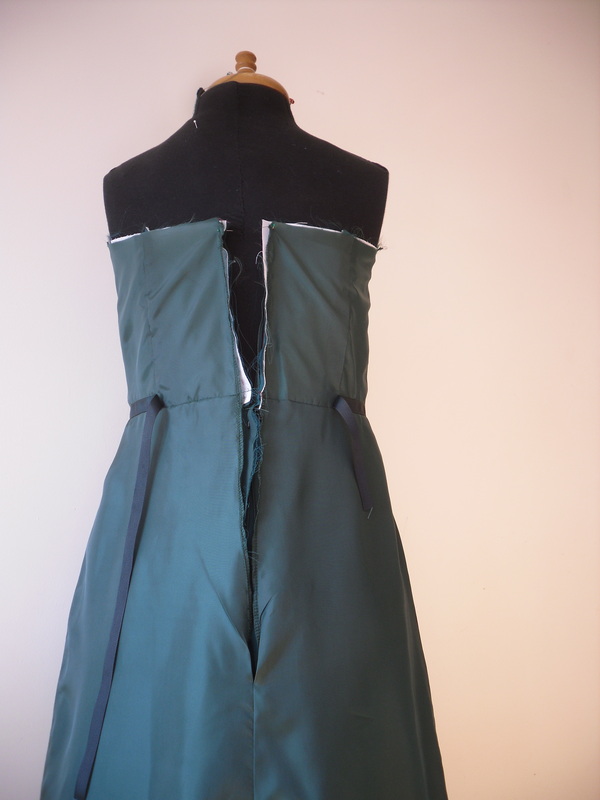
7. Attach the skirt front to the bodice, leaving a gap of about an inch at each side. Sew the seams in the skirt underlayer.
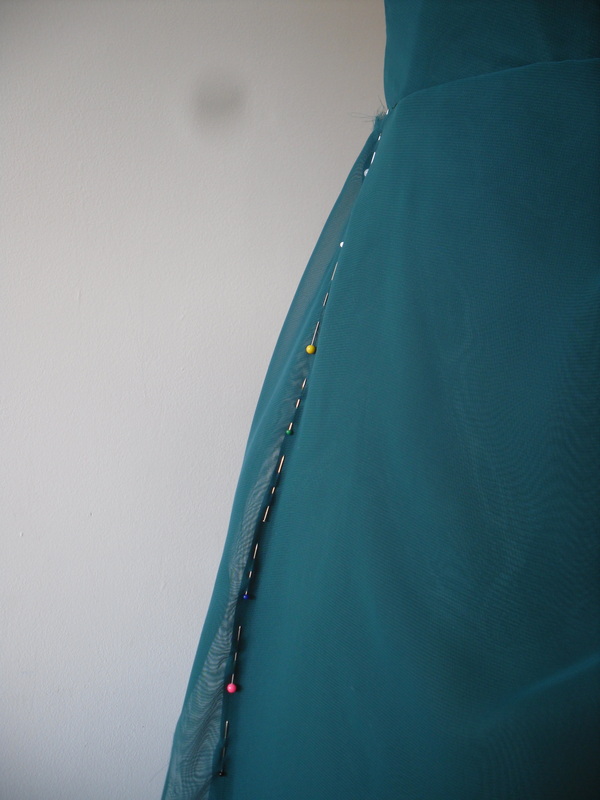
8. With the dress on the form, pin along your desired skirt seams (wrong sides together). Be careful to follow the hang of the fabric and not to create puckers. If possible, leave it hanging over night and check the seams are still straight in the morning. Use lots of pins and place them in the direction you'll be sewing - in my case I'll sew top to bottom, so the point of each pin is at the top.
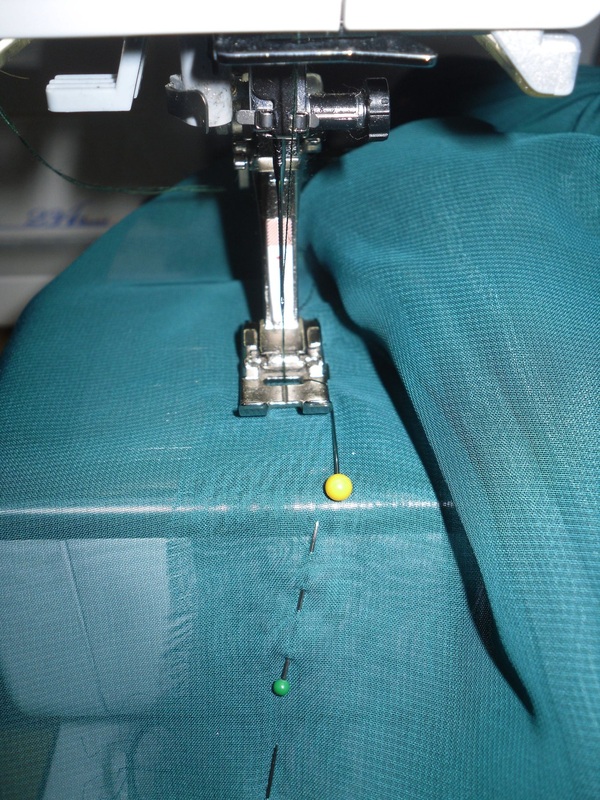
9.Sew the seams with the edge of your foot on the line of pins. Try not to stretch the fabric as you sew - just guide it through.
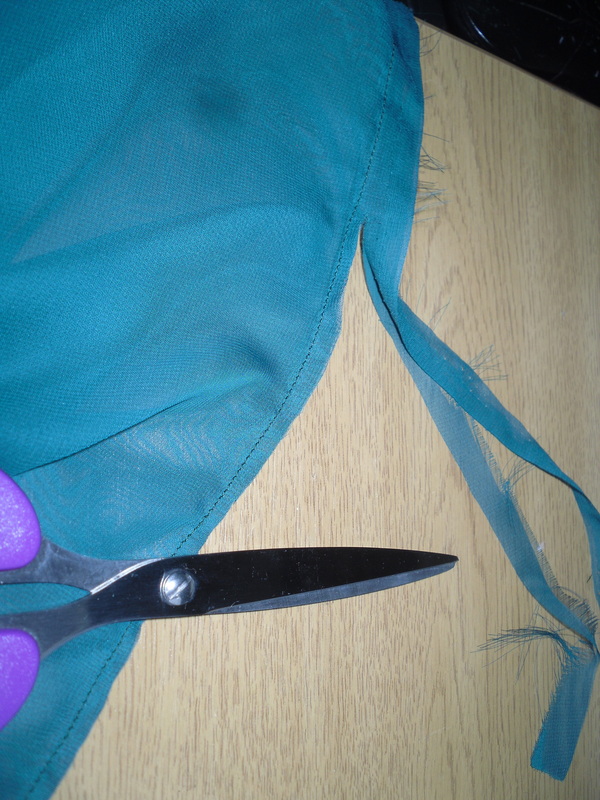
10. Trim the seam allowance to about 1/8". This stuff frays quickly so I suggest not trimming till you're ready to stitch.
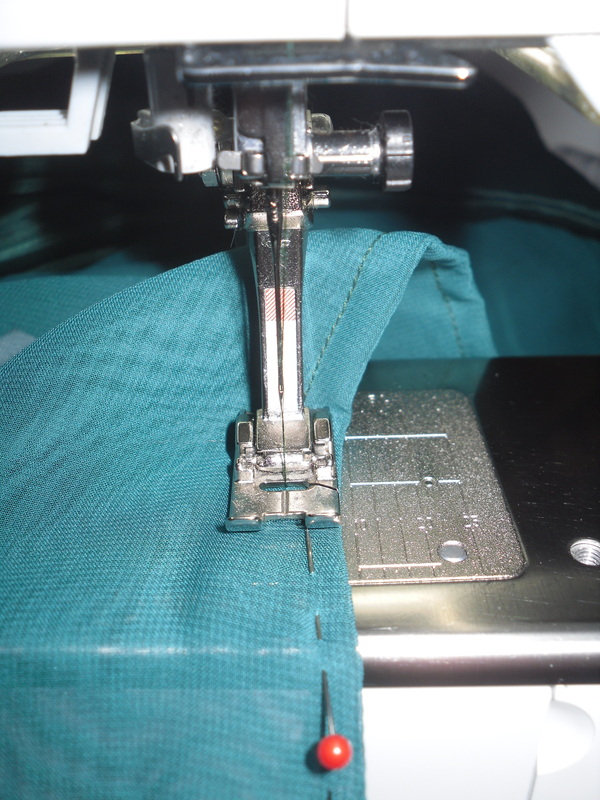
11. Turn your skirt so its right sides together and pin along the seamlines in the same direction as before, making sure to enclose the seam allowance
12.Sew the lining together with the same alterations as the dress. Add a waist stay - a piece of gross grain ribbon sewn to the waistline from side back seam to side back seam
13. At the final fitting we will mark where to add hooks and eyes to the waist stay. The waist stay will fit snuggly around the waist and will support the dress.
14. Attach the lining to the dress in the usual way, not forgetting to tack the waist seam of the lining to the waist seam of the dress so that the waist stay can do its work.
And that's it!
`Thanks to Lizi for letting me use her photos :)
1. Fitting the bodice - pin the bodice to fit as needed
2. Sew the alterations as pinned
3. With alll the alterations done, you can add boning to the seam allowance as needed. Front...
4. ...and back I wanted to make sure I had a nice firm foundation to drape the chiffon over
5. Pin the chiffon overlay to the bodice, pleating as desired to follow the curves of the bodice. I started with a large square of chiffon and used the bias as my starting line down the right hand seam.
6. Once your happy, unpick the seams to detach the bodice front from the dress and machine stitch around the edges to attach the chiffon. Remove the pins from the edges and trim the excess chiffon to the edges of the bodice. Hand sew the pleats down everywhere you have a pin.
7. Attach the skirt front to the bodice, leaving a gap of about an inch at each side. Sew the seams in the skirt underlayer.
8. With the dress on the form, pin along your desired skirt seams (wrong sides together). Be careful to follow the hang of the fabric and not to create puckers. If possible, leave it hanging over night and check the seams are still straight in the morning. Use lots of pins and place them in the direction you'll be sewing - in my case I'll sew top to bottom, so the point of each pin is at the top.
9.Sew the seams with the edge of your foot on the line of pins. Try not to stretch the fabric as you sew - just guide it through.
10. Trim the seam allowance to about 1/8". This stuff frays quickly so I suggest not trimming till you're ready to stitch.
11. Turn your skirt so its right sides together and pin along the seamlines in the same direction as before, making sure to enclose the seam allowance
12.Sew the lining together with the same alterations as the dress. Add a waist stay - a piece of gross grain ribbon sewn to the waistline from side back seam to side back seam
13. At the final fitting we will mark where to add hooks and eyes to the waist stay. The waist stay will fit snuggly around the waist and will support the dress.
14. Attach the lining to the dress in the usual way, not forgetting to tack the waist seam of the lining to the waist seam of the dress so that the waist stay can do its work.
And that's it!
`Thanks to Lizi for letting me use her photos :)


 RSS Feed